Saturday, December 25, 2010

Bottle Tags

Every year for Christmas we get my Dad wine. Now I do not buy any standard wine - what the heck is the fun in that?? So after a few years of this, and him getting some GAWD awful wine (or so I am told) we limit the fun names and get him at least one "good" bottle.

I have been told he has found some good wine this way, but it is hit or miss. For this year I found a few bottles. The first was something called Boarding Pass. Since it is flying and I haven't colored up the Cardinal from Flourishes yet, I decided to make a hang tag with the Cardinal on it.

I used the R22, 24, 27, 29 and 59 family for the cardinal. The branches are E70, 71, and then I added a touch of white Opaque White for the snow. I cut it out with a Nestie, and then I airbrushed with B21, 23 around the edges while still in the Nestie. The dots around the blue layer are with enamel accents.

Two of the next three bottles my daughters are giving to their grandfather. The first, my eldest daughter is giving him. She is the one who loves all things tattooey, and skulls... so she colored up the skulls from the Bombshell SugarSkull set (I have no idea what colors she used). This was placed on the bottle "Ass Kisser".

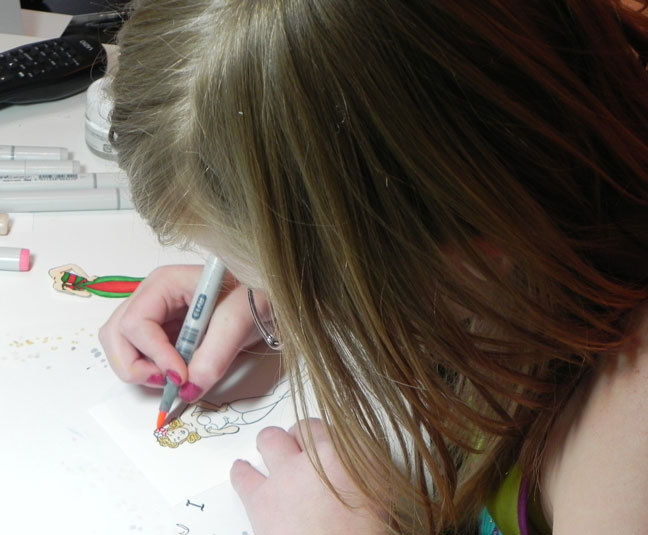
The next one is called "Chocolate Box" and my little one picked this wine out. It had a picture of an old pin up style head on it, so we went to the Bombshell girls. However, since, according to my daughter, "they have no clothes on" we dressed her up a bit with the digital gown.  She colored up the Bombshell Angel and the outfit. Hers is the green one on the left.


For the last one, I colored up the Retro Cowgirl Bombshell. Mainly using RV21, 23, 25 for the pink, cool greys for the black, and added Spica to make her SHINE. This one went on the wine bottle called "Sassy Bitch"

Hopefully he will have a great time with at least one of these bottles.

I hope everyone out there has had a Merry Christmas, and will have a Happy New Year.

Thank you for stopping by, and Hope to see you back again soon!

Tuesday, December 21, 2010

Extremely Distressing Card

So for all of you - this might seem fairly mild in the distressing world. But let me tell you, distressing is one of the hardest things for me. How do you make it distressed AND neat?  I just have a hard time with this type of thing. Add to that, I used TWO different designer papers WOW! Ok... so the two different DPs are actually the reverse of a double sided designer paper... but hey - - I actually used them both on the same card, without a class teacher saying to. WOO HOO.

I made this easel card for my husband for our 20 year anniversary. Not that I ever looked like this, but somehow I don't think me posing in the same position would have quite this effect. :-)

I used the instructions from Splitcoaststampers resource page for the Easel card, and modified to fit the size card I made - WOW as I tell my daughters - you do need to know math, if for nothing else but to make a card stand up like this.  The image is printed on Hammermill paper.  Once she was colored - - see below - - I tore the edges a little tiny bit - very very tiny bit - mainly on the corners, and then used a nail file on the straight edges - - and then used faded jeans dye ink and rich cocoa to ink up the slightly distressed edges.

The design paper is SEI Moravia mounted on a piece of dark brown bazzill. I added the brown Jolee's hotfix crystals and the flowers.
The lovely Mae Western from Kenny K was chosen, and I colored her with the following colors:

Skin - E000, E00, E01, R20
Hair - E11, 13, 15, 17, 18
Blue on boots, top, bandanna - B91, 93, 95, 97, 99
Brown on boots, belt, gloves, hat and holster - E70, 71, 74, 77
Gold on badge, bullets, gun - Y21, 23, 26, 28
Lips - RV23, R14
Once she was colored up, I added clear spica glitter to give her some sparkle on her eyeshadow, lips, strap of her top and bandanna.

I am entering this in both the Kenny K's Krafty Girlz challenge #24 this week which is where the distressing came in, and the Copic Creations challenge #41 which was to add sparkle.

Hope you all keep warm and have all your Holiday shopping done (it is NUTS out there!

Thank you all for coming, and I hope to see you back soon!

~~ Alaine


Monday, December 20, 2010

Bombshell December Sketch Challenge

I struggled with this. I did. I love how it turned out, but it has a bit of a story.


So I started out with the wings. I stamped them on clear acetate. Notice how it isn't clear acetate above...yeah... Uh huh... so I stamped them on clear acetate with a Copper and a Lavender Brilliance shimmery ink. And then I dried them and then cut them out... Then I colored my angel. I used colors that would match the shimmery wings. once the angel was done, the wings WASHED OUT. There was no detail, there was no life to them. I tried to glue them on, and pop them up in layers. But BLECK. And let me tell you - dimensional silicone is made for Patience. My name is not Patience. Finally after getting the entire REST of the card done and these sad little wings just looking at me all droopy and lifeless, and not being all Bombshell Worthy I gave up and removed them and scraped all the excess Silicone off of the card (because as I said - - I ALREADY did the entire rest of the card).

I then decided it needed to go opposite of clear and bleh.... so I went to the black cardstock and stamped in versamark and embossed with copper Zing. I like these much better.

The colors I chose were interesting to work with. Because I was trying to match the original wings, I chose BV11, 13 and 17 for the Lavender. The Copper was MUCH harder to match. The copper part of the cape and the top are first colored in E11, 13, 15, 17... but then I also completely went over it with YR00 and 14, to make it more coppery. Her skin is the E0000, 000, 00, 01, and her legs are that based with E11 and a bit of E13 mixed in. This makes them look a little more like hose I think. Her hair is the E11 series, just more of the darker edge of that, then the rest of her. I added topaz bling to her belt and a little black diamond stickles to the straps at her top.

Like I said, I LOVE how it turned out. The Basic Grey paper and all just worked brilliantly, but I really did struggle to get her to behave herself. She just wanted to be a dark angel apparently, and not the shimmery angel I was trying to force her to be.

Why don't you head on over to the Bombshell Blog and Bombshell Forum and check out all the great entries for this Sketch challenge. You may want to enter too... you have a chance to win some rubber!!

Thanks for stopping by. Keep warm!

~~Alaine

Monday, December 13, 2010

Baby it's COLD outside.

Yes, it is VERY cold! So cold in fact, the schools have shut down. Ok, granted it doesn't take much out here in East Tennessee for the schools to close. We have about 2 inches of snow, but the thing is ... People do NOT know how to drive, and the towns are not prepared as we don't get that much usually.

So in honor of that, and to meet the Kenny K's Krafty Girlz challenge this week which was snow, I made the following card for my husband:
The name of this lovely lady is Carmen Electrifying. She has been colored with Copics, cut out, and layered on top of the Cuttlebug Snow enhanced background.

I used E000, E00 and E01 for her skin (which was a significant amount of the coloring LOL). Her blush is R20. Her hair is E21, 25, 27, 29. I colored the light areas first with the E21, and then the rest of her hair with the E25. I then added the low lights of the E27 and 29 to a few areas, and then went back over it with the E25. Her eyeshadow is C00 with C1 at the very bottom. Her boots are of the C family - C3,5,7,9 and then I used R22, 24, 27, 29 to outline the flames. The inside are YR21 and 23.  I tried to feather a bit back and forth between theYR21 and the R22 / 24 to give it some more interest. The undies are R22, 24, 27, 29 as is her bandanna. For her glasses I used R22 and B000. I used them lightly and tried to feather a bit between the two so that it looked like glass.

Once I was done coloring her, I added some glossy accents to her boots and to the lenses of her glasses to make them shiny. The sentiment was printed out on my printer, and the red was colored inside with R24.

The red snowflakes are from K&Co.  I added a bit of Diamond Stickles to the embossed snowflakes on the white, although I am not sure you can see that very distinctly.

Thanks for stopping by. Hope to see you back soon, and I hope you stay warm.

~~ Alaine

Sunday, December 12, 2010

It's Snowing Outside - and a little inside too!

The weather outside it TRULY frightful for this lady living in East Tennessee, and raised in Texas.  It has been a VERY cold start to winter this year. The card I made mimics in my mind the cold colors.


I love this stamp, and I haven't colored it near enough. I have collected eggs most of my life, and I have  TON of Egg ornaments on my Christmas tree, I even have egg ornament placemats! So, when I saw this stamp by Impression Obsession I HAD to have them.  

This is my entry into the iCopic Color Challenge #9. The challenge was to use light blue, dark blue and white.

For my colors I chose the B2x family and used all of them on different parts (ok, except for B28 which I don't have).  I accented a little with G21, 24, 28 for the leaves, and the ribbon is supposed to be a light silver with C00, C1, and C3.  I used a little bit of B0000 and C00 on some of the "white spaces" on the ornaments to make it seem a bit shadowed.  I also highlighted a little bit with Copic Opaque white.


Once I was finished, I added hotfix gems to the ornaments, and a DOT of silver stickles at the center of each bow. I used my Nesties to cut out a double frame for the ornaments and I popped that up over it. The Happy Holidays (from Flourishes) is embossed with Versamark, and Silver extra fine EP. I added some more sparkly things and a silver and white ribbon through it. The Snowflakes are from Spellbinders and added Hotfix crystals.  (LOVE BLING at Christmas). Based on the Spellbinders punch art I am also entering this in the Paper Pretties challenge this week for punches. :-)

Thank you for stopping by. Hope to see you back again soon!!!

Alaine

Thursday, December 9, 2010

It's OK to be Little Bitty!


Ms. December over at Bombshell Stamps is hosting the monthly challenge and her challenge is NOT JUST PAPER. She wants us to stamp on anything but paper. YIKES. Outside my comfort zone.

I tried a few different things. I tried stamping with Stazon on Ornaments - EPIC failure - it was MUCH to slidey. So here is what after working for quite a few hours on different things finally resulted in this little lady:

It looks like paper huh, but if you take a look at it next to the stamp I used to stamp it you will see things a little bit differently:


Yeah... Shrink Plastic is SOOooooo much fun. I had such a fun time shrinking them with my heat gun, and I was laughing and cackling. My husband even started laughing at me because I was so easily entertained.

I made three of these little bitty ladies:

They were all colored when they were BIG with Copics (no shading required), then cut to the shape I wanted them, and I used my heat gun to shrink them to their teensy tiny state. For the Hula lady, I cut it out with a Nestie, and stamped her on BOTH sides. I airbrushed around the edge, and then shrank her. Once done I used silver stickles around the edge.

You should check out their challenge and jump in to participate. You could win a Lovely stamp set.

Thanks for stopping by. Keep Warm and  I hope to see you again soon! And remember - it's ok to be little bitty!

~~Alaine

Tuesday, December 7, 2010

Monochromatic Cowgirl

The theme for the challenge over at Kenny K's this week is Monochromatic.  I tried. Really, I did. I cam about as close as I think is possible. Just ignore the little green stuff on there, and the brown. You know. Imagine it isn't there... No reason to see it. :-)
This is the lovely Digi Image Cheyenne from Kenny K. I colored her with my copics. She is printed on Hammermil Color Copy Cover. I love this paper... as I have said before. VERY smooth and white. I colored her first... I started with her skin being E0000 and added E000 to show the shadow. Then I strategically added E00 and E01, Her boots and outfit are colored in BV0000, BV000, BV01 and BV02 and a touch of BV04. I have the light coming from the upper left corner... pretty much where the top flower is (Copic Creations challenge this part of the month is shading). Her hair is colored with E31, 33, 35, 37, 39. The rope and hatband as well. Once I had her colored I added C00 and C1 at the bottom beneath her leg and shoe.
I cut her out with a Nestie, and then I used BV000 and BV01 to airbrush around the edge of the Nestie. It kind of obliterated the grey a little at the bottom, but I love the softness of it. I hand cut out the Dark Purple mat, and then layered this on a light purple paper and the dark purple card base. I had some clear vellum that had a bit of purple flowers on it, so I used that to add a little more interest to the card overall. The Two flowers were also airbrushed with the BV000, 01, 02 and 04. Once done, it looked a little bare, so I found this fiber I had that had a variegated purple and added it in different areas.

I want to thank you for stopping by and I hope you come back to visit again soon!

~~ Alaine

Saturday, December 4, 2010

Winter White

For my second post today (WOW... it's a Christmas Miracle), I am posting the card I made for the Flourishes December Release Challenge. The challenge this month is to "wash our cards and creations with white! Show off a little pop of color, but make sure the overall feeling is white!"  WOW... I love mostly white cards, but they intimidate me a bit. For this one I stamped the sentiment from the Christmas Classics twice. First in a light sparkly blue, and then over it with versafine onyx black. I then clear embossed it. It is hard to see in this picture, but it gives the sentiment a nice shadowing look.

I then cut an oval in the textured AC cardstock and placed it over the stamped sentiment. I used the same oval and placed it in the center of the largest beaded ovals Nestie and cut them and embossed them both at the same time. To this I added light blue hotfix crystals on every other "bead" I popped this up over the edge of the image. I then used my Martha Stewart corner punch to add the lacy detail. I added clean hotfix crystals in certain areas on this. I popped up that layer as well, so that there is some shading.

Hope you enjoy it, and hope you all have a great Sunday tomorrow. Thank you for stopping by and Happy Crafting!

~~Alaine

Cowboy Ornament


Hi all... This is a really quick post. I made this ornament from a Paper Prettie stamp I won in a blog hop a few weeks ago (I put the link because they are having another one, and I am encouraging people to go check them out... they are really cute stamps).

This cowboy is adorable and he reminds me of my little brother... when he was little. Although I didn't draw in the silver teeth. ;-)

The image was cut out and then pasted onto an oval cut out of white paper. I was going to try to do the out of the box technique, but it was too hard to do on both sides of the oval, so I chose the easy way out.

The white oval is layered on the red beaded oval, and the pearls were added around the beaded edge. I wound a red ribbon through the top and tied a bow for it to hang from.

Copics used:
R22, 24, 27, 29
E50, 51, 53, 55, 57, 33, 35, 37
E000, 00, R20
W3, 6, 7, 9
B91,93,95,97

Thanks for stopping by

Sunday, November 28, 2010

Polka Dotted Ho Ho Ho

I HAD to color Santa today. This jolly fellow is from Stamps by Judith. The H and O are from Technique Tuesday.


I have no clue where I saw this challenge for Polka Dots and Spots. I just know that I did, and thought of this really neat ribbon that was red and had black and white polka dots on it. So I colored up Santa, and then cut him out with a Nestie. I edged the outside of the cut with black. Then I cut one bigger size up with the red, and embossed it so it had an edge. I took my enamel accents and polka dotted around the outside edge with alternating colors. I have been wanting to use them for a while, especially after watching several people use them on different sites, and this provided the perfect time. Although, I need more practice getting them just the right size. 

Once I was done, and I had stamped the Ho Ho Ho  in Versamark and white embossed it, I realized... I didn't have that ribbon. DANGIT!!!!!! ARGGGGHHHHHH.  So I substituted some white ribbon with black dots and black ribbon with white dots. I think it worked ok, although I am still frustrated because I so wanted to use that other ribbon. I must have imagined I had it, or saw it somewhere and didn't buy it. ARGH!!!

Santa is shades of red R22, 24, 27, 29, Skin E000, E00, R20, Boots and belt - C3,5,7 and buckles Y23, 26. The fur is Flower Soft - polar white, and his beard and hair and gloves are B0000, B000.

Thanks for stopping by, and I hope you have had a great Thanksgiving weekend. See you again soon!

~~Alaine


Saturday, November 27, 2010

Red and White Window to Paradise

Hello All. Here is my quick entry into this weeks Flourishes Timeless Tuesday Challenge. It was a sketch challenge, and as soon as I saw the sketch I thought of the Windows to the World set.

I used the Tropical window. I colored it with my copics and then cut it out. After I cut it out I realized I wanted it on white. SIGH. So I then stuck it back down on white. I used a simple white and red layering. The sentiment is also Flourishes and is stamped with Versafine and then clear embossed.

The copics used are R22, 24, 27 on the flowers, G21, YG63,67 for the greenery. The water is BG72 and 75, the sand is E31, 33. The sky starts at the bottom with Y0000, YR0000, R0000, RV0000, BV0000, BV000, B21. Once I was done... I added a bit of Copic white on the water and at the shore line. I also added it to the sky to show the clouds.

Now I am going to admit something... I have no idea if this was done right side up or not. I couldn't figure it out. To me, the fronds should be hanging down... but I have seen it done the opposite way on a couple of different cards. I could see where I put the clouds, being the sand too. So... WHO KNOWS. :-)

Thanks for stopping by.

~~ Alaine

Friday, November 26, 2010

Tag - STAY OUT!

This is for Kenny K's Krafty Girlz Challenge # 20.  The theme is TAG IT This can be either a tag, or a project with a tag on it. I have been wanting to color this drummer for a while, mainly to see if I could color the men as easily as the women. It was a bit different without the cleavage. LOL.
I colored the little drummer boy and then decided he needed to be a warning on a door tag.  He was colored with E50, 51, 53, 55 and a little R20 for the cheeks. His hair and his shoes are E21, 25, 27, 29. The bluejeans are B91, 93, 95, 97. His shirt and the edge of the drums and tattoos are C3,5,7, and the red drums, mouth, wristbands and tattoos are R22,24,27,29 and 59 if I needed it.  The drum heads are W00, 1, 3 and the cymbals are Y21, 23, 26, 28.

I added spica to the drum set and to his eyes. Once I was done I cut it and glued it down on a red cardstock. The DP was Shaken Not Stirred Collection from KaiserCraft. I cut a circle from the DP, and a slightly smaller circle from the black cardstock beneath. The Keep Out is from a set of stickers that I have.

He was a blast to color. My older daughter has her dorm room done up in black and red, and wanted it to take to school. Yay.


Thanks for stopping by, and I hope your weekend is a blast!
~~Alaine

Wednesday, November 24, 2010

Lovely Ladies and a Follow that Blog contest

Hey there y'all. Loving the day off today, and the chance to get to color. I have colored two different lovely ladies today. This first one was done for Bombshell Stamps challenges for the month of November. I combined both their sketch challenge, and their monthly challenge which was Black Friday. Check out their blog for more information.
 
So I took the lovely Retro Cowgirl and colored her in black. Or really greys to make it look black. She is E50, 51, 53 with a bit of R20. The greys are all C family, and the stars, etc.. are in black spica. Her hair is E13, 15, 17, 18.  Once she was colored, I cut the paper to size and then sponged on black chalk ink on the outer edges.

She seemed rather naked when I was done, so I added a bit of swirly bling. Much better. The inside is a quote from Mae West "A dame that knows the ropes isn't likely to get tied up."

This is Kenny K's Alice Chains. I love the design and she was a blast to color - - although a real pain in the booty to try to cut out (all those links are murder).

I colored her with blue B21, 23, 24, 26. The Skin is E50, 51, 53. For her hose, I colored her skin first with the E50 and 51, 53. I then went over the hose areas with C00 and a bit of C1 so it would make it look like black fishnet with skin underneath. Her hair is the Y21, 23, 26 series, but I added a bit of R22 to it to add a little bit of different color.  Her skirt was colored with B0000 and then I used B21, but not directly. I did the tip to tip method with the Colorless Blender to make it really light. The greys are all C1, 3, 5, 7.
__________________________________
On a final note - Bombshell stamps has a really new blog... and they have a new series of stamps out - digital and rubber. They are western style and all you have to do to win one of these is to follow their blog and post a little blurb on your blog promoting the contest. Easy... and  then you can win this lovely lady and all her neat accessories / sayings. YAY!


Thanks for stopping by. Hope to see you again soon!

~~ Alaine

Monday, November 22, 2010

Yay - New Rubber

So I got a pretty little package in the mail the other day and got some of the more recent Outlines stamps. One of them I was so excited to see was this Caroling Bird. YAY.
I inked this beauty up with Memento on Hammermill 60 lb, and colored it up with my copics (colors below). I added some silver smooch on the stars and hat, and a little bit of copic white on the wing and ornament. I then went to town with the crystals. I have red crystals and a couple of different colors of blue on there to bling it up a bit.

The paper is a bazill blue, and the DP is a Me and My Big Ideas. I cut my largest circle from the middle of the Design paper. I then cut the navy with my largest Lacy Circle nestie and cut out the center with that same size circle. I then mounted the image behind the DP, and then lined up the lace circle over it.  I thought about popping it up over it with foam tape, but it didn't look quite right, so I nixed that idea. It is all mounted on the navy and then on white cardstock.


Copics -
Blue - B21, 23, 24, 26
Green - G21, 24, 28
Red - R22, 24, 27, 29, 59
Brown - B21, 25, 27


Thanks for stopping by. Hope to see you again soon.

~~Alaine

Sunday, November 21, 2010

Kenny K's Krafty Girlz DT Call

Kenny K is having a DT call. I love the images, because they are so different. They are hot and crazy and let me go wild with funny sayings. They are luscious to color, and just make fun cards. I have several cards using Kenny K images, and I am actually in the process of coloring one right now too. So, to pick two was hard, so I asked my husband to weigh in!

He picked these two:
This first one... was the colors, the greens and purples, and how fun she looks yet still girly. 
He was like - Definitely the Jingle My Bells one. He said he liked the way her hair was colored.  :-)

So, here is my entry. I hope you all like it. Go check out the Design Call HERE, and check out the WOW of all the entrants.

Thanks for stopping by, and off to color more.

~~Alaine

Saturday, November 20, 2010

The Stockings Need to be Hung


It has been a CRAZY CRAZY few days at work, and I have had almost no time for crafting... ok lets be honest here... I have not cracked a craft for over a week. So here I am getting back to it. I decided to jump back in by doing a challenge. This is for Flourishes Timeless Tuesday challenge for this week to "Just do it" and get the Christmas cards done. These are from their Christmas Classics set and I think that they are beautiful. I wanted to try to color them a little differently, not the typical Christmas colors of red and green. I also drew some stitches on the middle one... not sure I like how that part turned out, but... oh well.

Of course I colored these with my trusty copics. The colors were primarily G40, YG63, 67, R81, 83, 85,, V93, 95, e50, 51... and then some accents. The bar and hangers are colored with Gold spica, and I have clear spicad some of the items in the stockings, especially the wrapped things.

The green paper is from a mat stack, and the DP is SEI Christmas Mint Rasberry truffle.  I used some little clear purple stones and put them in several places to tie into the stockings. I LOVE this DP. It is just so crisp and clean.

Hope everyone is having a great weekend, and see you again soon.

Wednesday, November 10, 2010

I Believe!

I colored this lovely Xmas Hottie from Kenny K digi images this weekend. She was so much fun to color, and I had to dress her up in non-traditional Christmas colors. Her outfit is BG10, 13, 15 and V12, 15 and 17. The gloves and boots are black vinyl done in Cool Greys C3, 5, 7, 9.  Her hair was colored all over in E11 first, then I added a little E13, 15, 17 in different areas. Then I blended back over with the E11. I like the way it ended up, it has a distinct curly look IMO. Her skin is E000, 00, 01. I used a bit of RV10 and 13 for her lips. Her blush is RV20.


I colored the "fur" at the tops of her boots, gloves and on her hat with BG0000 and BG000. I then added a bit of frosted lace stickles.

I let her "rest" for a bit (while I was sick)... and picked her up again today to finish her up. I found this lucsious purple paper in the DCWV Black Currant stack. I paired it with the black and purple CoreDinations paper I had.  The stamp is one from Stamps by Judith and was stamped in Versamark and heat embossed with White Zing EP.  And of course she had to be blinged up. Couldn't leave her surroundings naked so to speak.

Hope you enjoyed her, and hope you come back to visit soon.

~~ Alaine

Tuesday, November 9, 2010

Another blue Christmas Card.

I made this card over the weekend. The stamp is Caroling Sophia from Paper Pretties.

I colored her up, and then cut her out. It was that or mask over her, so I could do the background in the Nestie, and well... masking seemed harder. :-)

The lovely Sophia was colored with B12, 14, 16, 18, G14, 16, 17 and RV10, 13, E11, 13, 15. Her face was E000, 00, 01 and RV10.  I used a bit of Polar White Flower Soft for the fur on her hat and the boots.

Once I was done I cut her out. I cut out a scallopped oval with my Nestie, and while still in the Nestie I used my airbrush and the B12 to give a light layer around the inner edge of the Nestie. Sophia was pasted onto the oval...and then it was popped up on top of a beaded oval. I added Jolee's Hotfix pearls around the edge of the oval.  

The snowflakes were cut out with Spellbinders and layerd. The design paper is from DCWV  Holiday Collection.  The sentiment came with the Caroling Sophia stamp.

Thanks for stopping by. Off to take some more cold meds, and a nap. :-)

~Alaine

Saturday, November 6, 2010

I'll have a BLUE Christmas

Release Week Challenge over at Flourishes this week is Warm Winter Wishes using cool shades of blue. I LOVE blue, and using blue at Christmas. I used the new Flourishes stamp set released last month.

I colored the ribbon first with all over with B32. I then added in B34, 37 in different areas to give shadow and movement. I blended in with the B32. I added a tad of B39 on the inside of the bow, and as a touch of shadow underneath the ornaments.

The greenery was G21, 24, 28 and YG63, 67 and G28.

The ornaments were colored with B000, 00 and 02 as well as C00, 1, 3. The bells were C1, and 3 and then blended with C00. Once I had all of it colored, I used some silver smooch on the bells and the ornaments, as well as some diamond stickles to make the bow and ornaments sparkly. The snowflake is white enamel accents with a little silver smooch added in the center of the white.

I cut it out with a Nestie, and went one size larger for the blue frame. I then used the largest size Nestie to cut a hole in the middle of the patterned paper.  The finished card is 5.x. 5.

Thanks for stopping by. Going to go do some more coloring! Hope to see you again soon.

~~Alaine

Sunday, October 31, 2010

I got Bells!

Here is my Christmas card for the week.
This is Mrs. Claus from Kenny K. I colored her with E000, E00and E01 for her skin. For blush I added a bit of R20.  I then colored her gown / robe and hat with G14 all over and added G16, 17, 19 in for shading and shadows. The red is  is R24, 27, 29, 59. Her boots are Y21, 23 and I added enamel elements on the back of the boot, the sole of the boot, her necklace and the belt. Her hair is E13 all over with E15, 17, 18 shading.

I added polar white Flower Soft for the fur. I also wanted to enter her into the Color me Copic challenge for coloring makeup. I usually use the E000 technique for skin, but I don't always do a lot with the eyeshadow.  So I used the technique for that.

I first colored with G00 all over, then added darker G12 at the inside corner and blended out. I added V12 on the outside edge and blended in, and then took the E000 over all of the lid area to smooth it over. I like how it ended up.

Once I was done, I printed the sentiment out on my computer, and punched out some holly leaves using Martha Stewarts punch. For the berries I used hotfix crystals.

Challenges I am entering with this one.

Color Me Copic - Makeup
Kenny K - Anything Goes
Flower Soft - Sprinkle Challenge Christmas

Thanks for stopping by. I am off to make a quick card for a coworkers birthday. Have a wonderful Halloween - or what is left of it.

~Alaine

Wednesday, October 27, 2010

Bombshell Blog Hop - Halloween!!!

Welcome to the Bombshell Stamps October Bloghop. This months theme was Halloween - - how perfect for the Bombshell Stamps. If you arrived from Bombshell Stamps SPARKLY new blog, then you are on the right track. Yes I said Sparkly new blog. So if you didn't arrive from there... pop on over and check it out.

I took my Sugar Skulls stamps and stamped them twice with Versafine and clear embossed. I did a side step card, but in the middle - and then taped all the steps together. I used spider web ribbon to hang them from a fine thread strung across the top of the card. I then printed a black and orange saying from my computer and attached it to the top.  The paper is Basic Grey.

The prize this month is two Bombshell Stamps sets. If you leave comments on each of the blogs on this hop you are entered into a random drawing. There are several ways to win this prize package... and you can see what they are on that sparkly new Bombshell Blog.


Now... your next stop on the blog hop is Alison's Blog!

Hope to see you again soon!

~~ Alaine

Saturday, October 23, 2010

Bombshell Stamps October Challenge

Hi All... this is my entry into the Bombshell Stamps October Challenge.

Mary Ann is October's Monthly Pin-up Girl. She set this month's theme, "Halloween Pocket Card or Halloween Party Invitation". Get your Bombshell stamps out and make Halloween themed cards or invitations. They've just got to be encased in some sort of pocket!

This is my take on the challenge:

I took the Butterfly Angel, and set her in a little lined coffin. Aren't I evil? 
I masked her off so she was wearing an evening gown instead of the skirt and top. I used a little stickles and glitter to add some bling to her outfit. I colored her with Y21, 23, 26, 28.

I used a little black lace on the edge of the inner card for some "class" :-)

The card says Vamp It Up embossed in Gold. The flowers are yellow plain flowers with a little additional champagne colored stickles added to them.

Thanks for stopping by. I am getting ready to do some traveling for work, but I hope you stop back on Wednesday for the Bombshell Blog Hop.

~~ Alaine

Sunday, October 17, 2010

Kenny K's Sketch

Hello All, This is my entry into this weeks Kenny K's Krafty Girlz Challenge. The challenge was a sketch challenge.  I flipped it on it's side, and then mirrored it.

I took Kitty Katastrophe and colored her with Copics. I tried to make her hair look silver. The intent with the color choices was to do something that worked with the design paper in the back. But I didn't want black hair... so I thought Silver was the only logical choice.  The image was cut out with a Nestie, and then while still in the Nestie I airbrushed the edges with C1, C3 and R24. 
The Red flowers at the bottom were cut out with Nesties, embossed, and then I went around with Copic 110 on the embossed part to give it an edge. Silver flowers from Michaels were put on top with little crystals.
For the red, I used R22, 24, 27, 29 and 59. The blacks and Silvers are all cool Greys C series. Skin is E0000, 000, 00, 01 with R20.  I did use a touch of blue spica for her eyes, and clear spica on her lips, eyeshadow, etc... I also used some of the silver spica in her hair, belt, buckles on her boots. The pearls were dotted with copic Opaque whote. They actually shine a bit in person. :-).

Thanks for stopping by. Hope to see you again soon.
~~ Alaine


Saturday, October 16, 2010

Wish You Were Here!

This is my entry into the Copic Creations Challenge No. 37 which is coloring tricks using the Copic Blender.

I used two different techniques on this card.

The first was on the background. After I colored and got the shading that I wanted, I went over the entire area with the Colorless Blender.  It gave it a  more mottled look (easier to see in person).  Then for the glass, I colored the glass edges with BG0000 and a bit of BG000. Then since I had colored the wall behind the glass with E31, in the panes of glass I used the Colorless blender and the tip to tip method to pick up a little bit of E31 and streak it through the BG0000 areas. I went the same grain as the glass was showing... It made it look like glass. I liked how that part turned out a lot.

Thanks for stopping by. Hope you have a wonderful Weekend!

~~ Alaine

Stamps Used: Flourishes Windows to the World
Paper Used: K&Co Life's Journey, Bazzill, Hammermill Color Copy Cover (for image)
Ink Used: Memento for main image;Versafine Olympia Green for Sentiment
Copics Used: Background - E50, 51, 53; Windows - YG 91, 93; Leaves - YG63, 67; Flower Pot - E04, 07, 08; Flowers - R22, 24, 27; Glass - BG0000,000, E31 (tip to tip with Colorless Blender

Tuesday, October 12, 2010

Christmas for this week

So, I have a few cards to share today. The first set is a series of Quick Christmas Cards I made using Outlines Rubber Stamps. I used Joy Ornament Sq Large and Merriest Christmas Sq Large. I used a sparkly white and gold paper, and Versamark and Gold and Silver EP, and then cut out the squares and mounted them with the outer square directly on the card, and the inner square popped up using foam tape.


The second card I am putting up was made for the Color Me Copic Challenge #5. The challenge was to color using the clothes coloring technique shown on the blog. I have to admit, this is NOT how I usually color, and it was difficult. I typically color all over light and then add the dark. For this challenge we were to color dark in the shadows and then blend them out using lighter colors. Some of the Design Team did GORGEOUS GORGEOUS samples.
I cut out the image with a Nestie, and while still in the Nestie I used the BV000, and the BG72 to give it a little bit of an edge that matched the color of the DP.  The DP is BoBunny, and I made a white double bow. I added a bit of blingy bling on the upper right corner to balance out the white sparkly snowflakes on the left.  We wish you A Merry Christmas was stamped as the last bit with Versafine.
I used BV000, BV01, BV02, and BV04 using this technique. Well... I used them in reverse order.  :-) I may use this technique occasionally, but I feel more comfortable with the reverse. I feel like I have more control over my final image hues. Like I said though, Some of the design team had GORGEOUS cards, and I may need to practice - especially with those golds. That angel on their site was amazing.

For the hair I used E25, 27, 29. The bear was E31, 33, 35, and then I dotted the fur with the colorless blender to give it a little texture.

Hope to see you again soon. Have a great week.

~~Alaine